
One of the great things about My Maps in TMLC is the ability it affords you to Share an exercise that contains several maps with a student or teacher who has TMLC access. You may share an exercise as Read-Only or grant edit rights to the person you share the exercise with by deselecting the Read-Only option. You may also choose to share a separate copy to each user, or collaborate with everyone.
At this time we recommend having only two to three users editing a shared exercise concurrently. We will increase collaboration performance in the near future (2017).
Share Exercise: Overview
Remember that an Exercise may contain one or more different maps. So, when you share an Exercise with another member of the Community, you are sharing all of the maps within the Exercise with that person. Let's walk through how to share an Exercise:
Login to TMLC and navigate to My Maps
- Find the Exercise you want to share with another user and click the Actions dropdown to select the Share option
Share icon

Share Exercise dialog window
- IMPORTANT: You must select the name/login id from the drop-down list that appears as you begin typing in the blank field. This ensures that you are entering a valid name / login id that exists in TMLC. PLEASE be sure to select the correct name/login id.
- If you do not find the name / login id of the person you want to share with, that person either has not yet created at least one map yet OR they are not in the system.
Share Exercise pop-up dialog


When you open a Read-only shared exercise you will see a pop-up warning appear.
- You may click Dismiss to make the message disappear, but remember that if you edit any maps in the exercise, none of your changes will be saved.
Read-only warning message

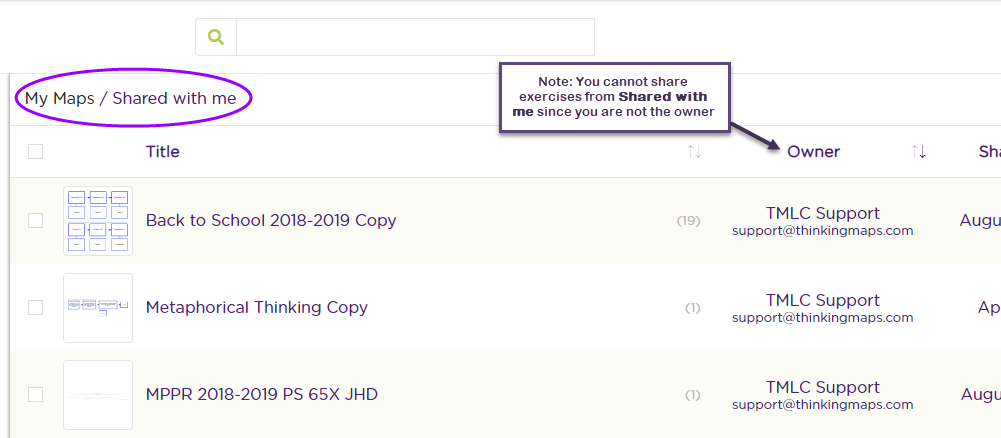
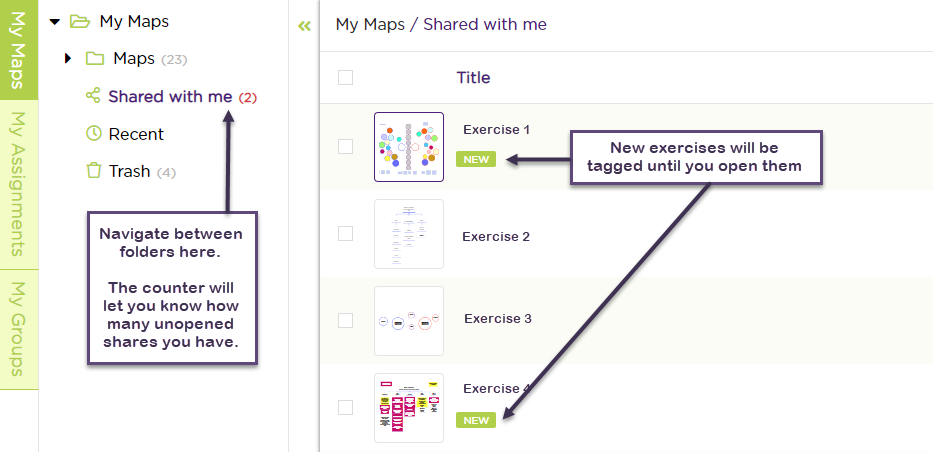
- Newly shared exercises are indicated by a red number on the Shared with me link and a red dot next to the exercise itself. Once you view a shared exercise, the number decreases by one and red dot disappears.
- Notice that the Share icon is not available for maps owned by others and shared with you.
Share Exercises: Example uses
1. Example: As a Teacher you may share with your students a Read-Only Exercise containing several maps that they may use as references or examples for a specific project. Instruct students that any changes that they make will NOT be saved.
Students may then create their own Exercise and maps, then share their Exercise with you when their work is completed.
You may require students to share as editable (de-selecting Read-Only) so that you may add comments directly to their maps.
- Be sure to remind students to refrain from editing their maps until you let them know that your work is done.
2. Example: As a Teacher, you may share 4 different Exercises as editable (deselect Read-Only) with 4 different small groups of students in a class for an in-class activity, real-time.
Each Exercise may contain several maps that you have started.
Each group can work together on a project, deciding what to add to each map in their Exercise.
One student from each group may be assigned to log in and actually make changes to the maps in the shared Exercise, based on the decisions made by the group.
Once completed, you and all of the students within a group will see the changes made to the maps in the shared Exercise.